
![]()
1976 Palm Beach
TZE166V100710
Fan clutches are among the most talked about and possibly misunderstood components attached to the engines of GMC Motorhomes. I know I really never paid attention to them before. According to the 1975-1976 Maintenance Manual in the Engine Cooling Section under Fan and Fan Clutch, the Fan Clutch is described as a "hydraulic device used to vary the fan speed in relation to the engine temperature. Automatic fan clutches permit the use of a high delivery fan to insure adequate cooling at reduced engine speeds while eliminating overcooling, excessive noise, and power loss at high speeds."
I've heard that when they engage it is like the sound of a 747 on takeoff or of a transmission shifting into a lower gear. Well I never heard any of these satisfying sounds in my GMC motorhome. At high cruise speeds my coolant temperature on a warm day would rise up to 220 degrees. That's a temperature that I am really not comfortable with. I think the coolant starts to boil when not much over 220.
For close to four years now I've debated replacing my fan clutch with a new unit. I've put it off because I read the Maintenance Manual and the procedure it describes for the removal and replacement sounded very time consuming and complicated. Also, I had heard that some of the fan clutches available are inconsistent in their operation. That is, different clutches with the same part number from the same manufacturer, will engage at different speeds and temperatures. Some GMC Motorhome owners talk about how they have to keep replacing fan clutches until a unit is found that works properly.
I didn't want to do any of that. However I found out that the job could be done in less than an hour and that it could be done entirely from the top through the engine hatch. The procedure I used was the well known Stora's Top Removal Method to replace my clutch instead of what was recommended by the Maintenance Manual .
I bought a AC Delco #15-4644 fan clutch to do the job. It was described as heavy duty and is the one recommended by Cinnabar. Most reports I read about this clutch have been more favorable as compared to the other well known unit. Of course the other unit has a life time warranty and the AC Delco has only a 90 day warranty.
The lengthy step by step instructions for the removal replacement of a fan clutch as described in the Manual.
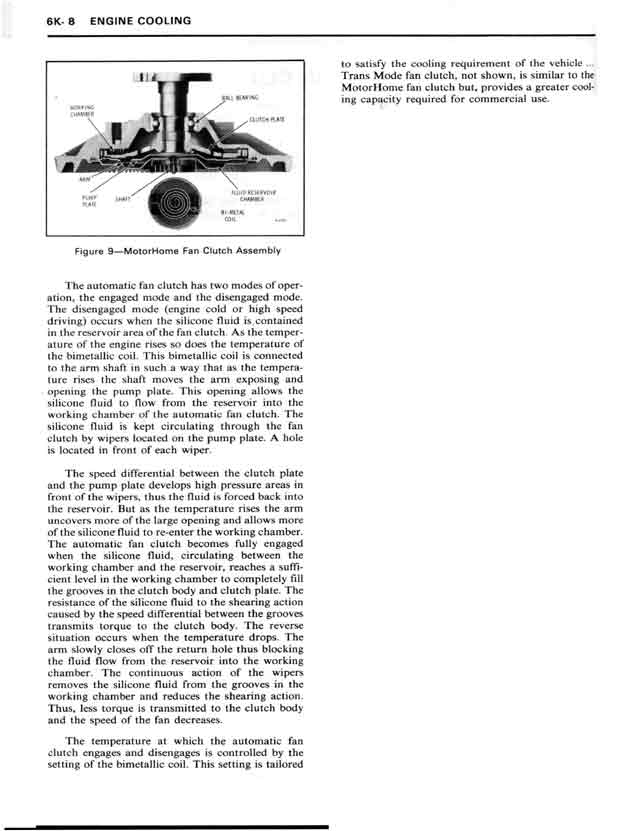
How a fan clutch works according to the Maintenance Manual.
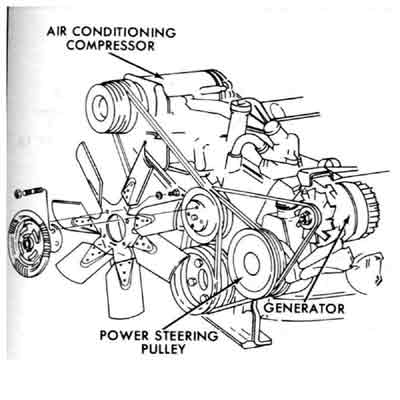
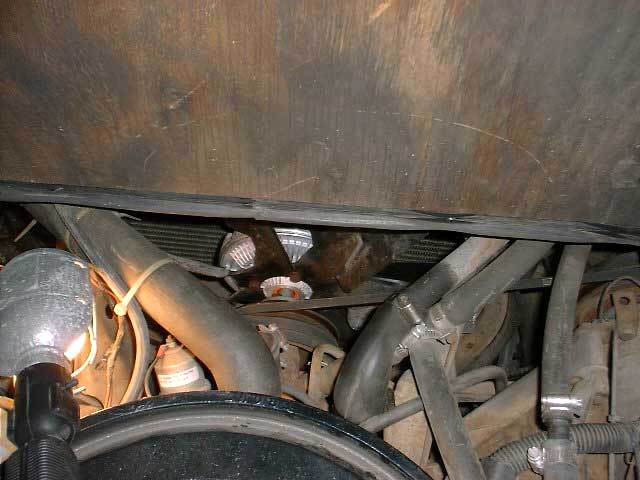
The major components of the fan, fan clutch and other front of the engine components.
The dark color of the underside of the hatch cover was from the engine fire I had back in 2001.
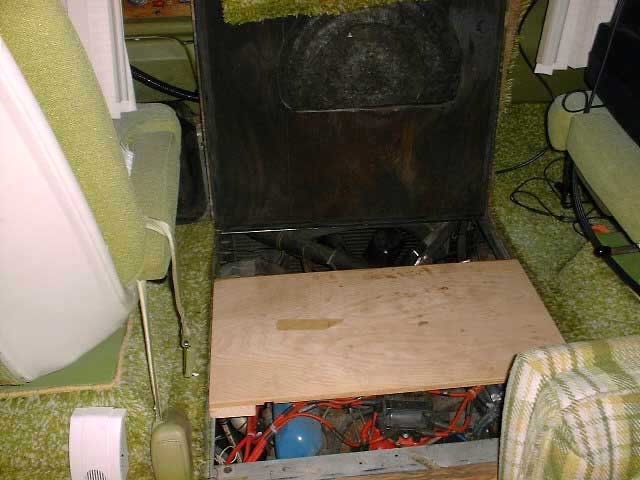
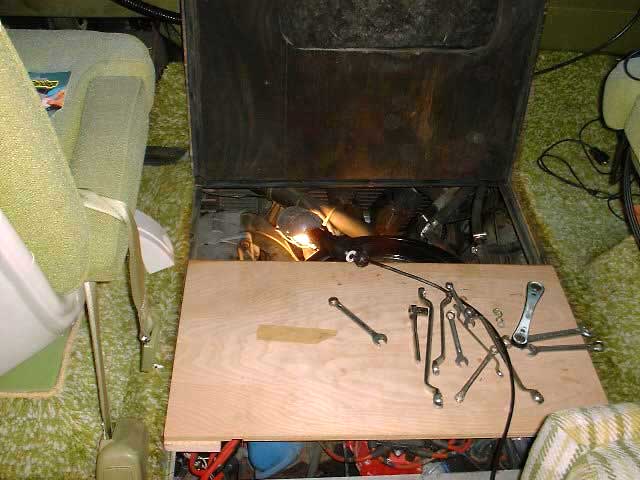
The first step was to make sure I had a platform to lay on while doing the R&R. This was just a piece of plywood with 1" stock screwed to the edges to make sure the platform misses the air cleaner. This ended up being a very good way to lay across the top of the engine. By the way the only tool that I really needed was a 1/2" combination wrench. The other tools shown were not needed. The trouble light was a good thing to have.

There are 4 nuts that attach the back of the fan clutch to studs on the water pump hub. 4 bolts attach the front of the fan clutch to the fan. I shot each of the 8 fasteners with penetrating oil and let that sit for 15 minutes or so. Then I removed 3 of the 4 bolts holding the fan to the clutch. I left the 4th in place loosely. I was able to reach all of the bolts because the fan turns. I kept one of the bolts on to keep the fan or clutch from dropping while I removed the nuts holding the clutch to the water pump pulley hub. I was able to get at all of the nuts with my small 1/2" combination wrench. After I got the nuts off and while holding on to the fan and clutch I removed the last of the 4 bolts. In order to gain access to all of the nuts I hit the starter briefly, just enough to move the water pump hub around. After removing the hub nuts I was able to remove the clutch. I left the fan laying against the pulley. I didn't have to loosen up the belts or get under the coach to get the clutch off. So far so good.
Installing the new clutch was basically the reverse of the removal. I used Loctite on the nuts because there were no lock washers and the studs were too short for lock washers to be used. I tightened the fasteners by feel to 20 ft/lbs. There was no way to get my torque wrench in there to do it otherwise.
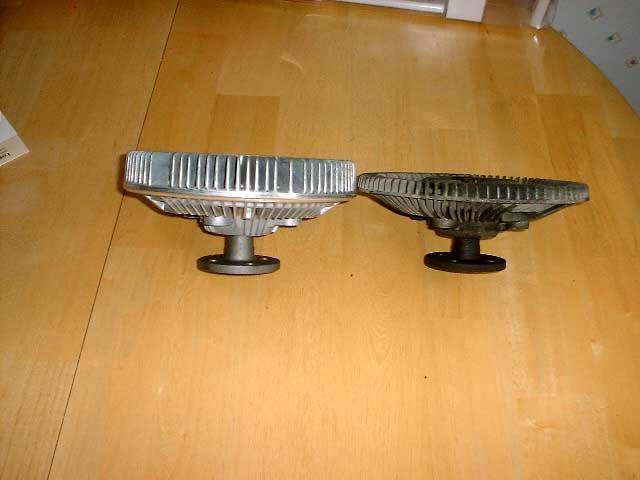
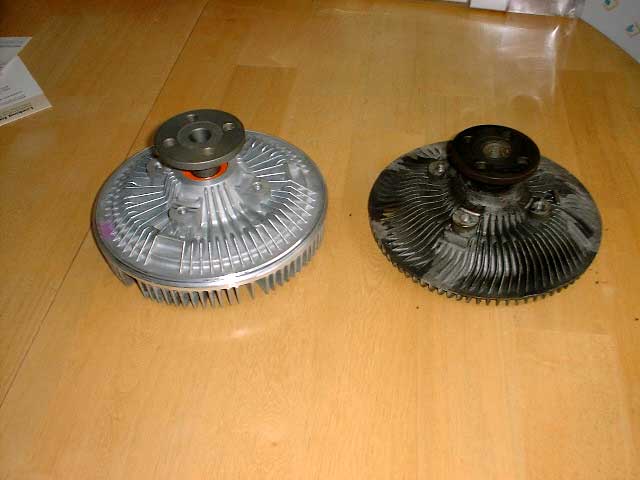
Here a few pictures of the heavy duty AC Delco #15-4644 clutch I bought and the one I removed. The smaller unit looks like the one shown in the manual. I don't know the brand but possibly it is either a Hayden or a standard duty AC Delco.
I was able to do the job in about an hour. If I had it to do over again I bet I could do it in less than 30 minutes. It was really not that bad of a job.
A few days later I took the GMC out for a 150 mile trip and found that not only were my temperatures much lower, the engine actually sounded better. Previously there had been sounds that I associated with the various accessory drive belts. They are gone now. Also during the drive I never heard the 747 take off sound but I am convinced the unit was doing its job. Where before I would get close to 220 degrees of coolant temperature before I had to back off on my speed, it never got above ~210 and that was at 75MPH! Something I could never do before. Also my oil temperature ran about 20 degrees lower and as an added bonus my oil pressure was up by about 5 psi. I guess cooler oil runs at higher pressures. I think I still will have to replace or rebuild the radiator at some future time. I'd rather have my coolant temps under 200, but it is still running cooler than it did before.
This was something that I should have done a long time ago. It was almost fun doing the job because it turned out OK and I didn't mess anything up which is usually the case when I tackle jobs on my GMC. I also had no skinned knuckles or sore knees and belly.
The real secret to my success was the platform that I made to lay on while working. I also suppose if my fingers were fatter it would have been a harder job. There really isn't much room in there to get the nuts on and off the studs and you mainly have to go by touch because you can't really see them. I dropped one of the nuts and had to get out and look for it under the coach with a flashlight because it was working at night time. That added about 10 minutes to the job.
Would I do it again myself or pay someone to do it? Yes, I would do it myself. In fact you could do this job on the side of the road in a rain storm.
After writing this up I received a few emails about experiences of other GMC Motorhome owners. Here's one of them:
Friday, October 04, 2002 2:14 PM
Several comments on your fan clutch replacement, having gone through the same thing recently. Replaced my fan clutch as a precaution following a water pump failure. Used a Hayden 2797 which looks remarkably similar to the new AC-Delco one shown on your site. Possibly the same unit???
Anyway, found that by disconnecting the power to the HEI by removing the connector at the front right hand side of the distributor you can jog the engine without starting to get at the nuts a bit easier, saves some time. Remember to reconnect when finished.
Also used locking nuts of the thin deformed type (not the nylon insert type) which hold well and save space on the studs, no Loctite needed but couldn't hurt.
Considering turning off the first 2 or 3 threads on the studs to their minor diameter to locate and start the nuts easier a la NASCAR wheel studs. Feel free to add these to your page if you think them worthy.
Bob B. Cincinnati '77 Palm Beach 455
Page was last modified: 06/12/2007 02:44:39 PM