
![]()
1976 Palm Beach
TZE166V100710
Shortly after I started reading the GMCNet GMC Motorhome Email List I became aware of a mysterious device called a macerator. At first I thought it was some sort of blender used to make frozen adult beverages like margaritas. I found out soon that I was very far from the truth.
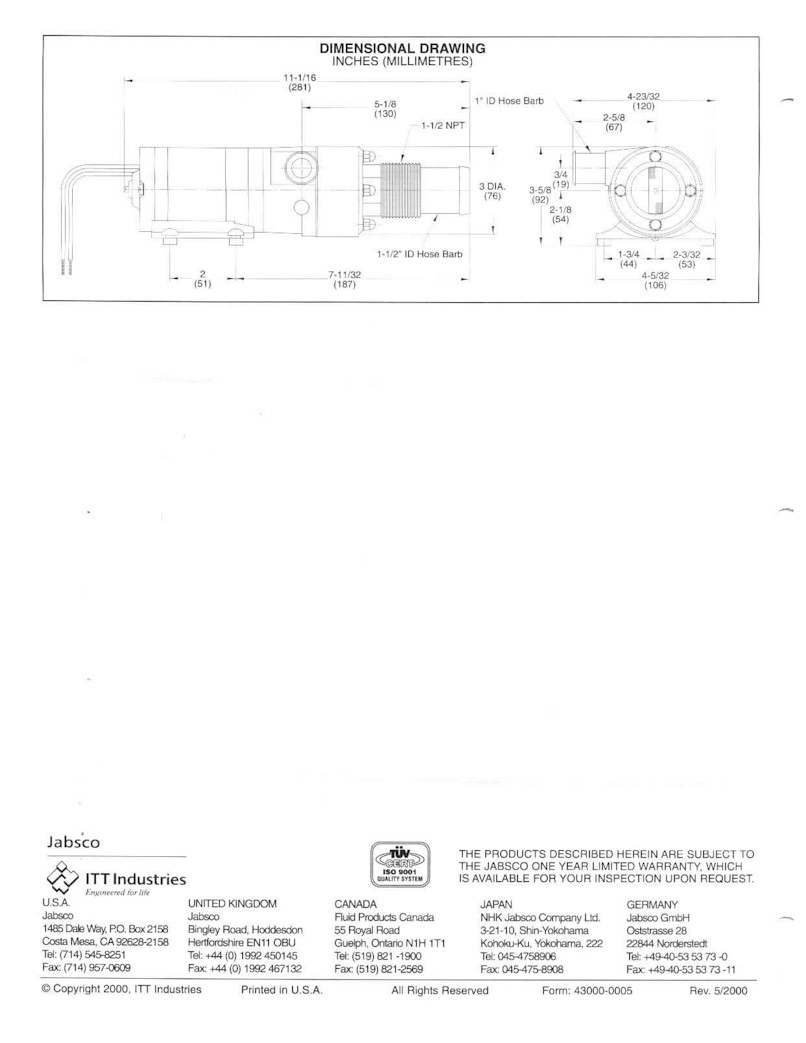
It turned out that a macerator is actually a device that is used for pumping out holding tanks. The macerator grinds holding tank waste into small particles that easily passes through the pump's 1" discharge port. They are self-priming and have a flow rate of 12 GPM. This allows the pumping of a full GMC motorhome holding tank in about 3 minutes.
Besides speed, macerators makes a messy job a little less of a hassle.
July 1, 2001 I installed a macerator kit that I bought from Denny Allen. I'm really impressed with the kit because it had everything that I needed, except for a part I needed for my non standard holding tank. He even sent glue to connect his really cool valve to the coach plumbing.
I had Cinnabar install a new holding tank two years ago. In the process they eliminated the old dump pipe with the swivel. They replaced that with a 3" silicon coupler. The coupler is more flexible then the old pipe. The problem is that Denny designed his kit for that old style. I had to adapt, but it was still easy.
Follow this link for more information on Denny's kit.
Allen's
Classic Service
Macerator pump kit for GMC Motorhomes
I'll have more text later that describes what I did.
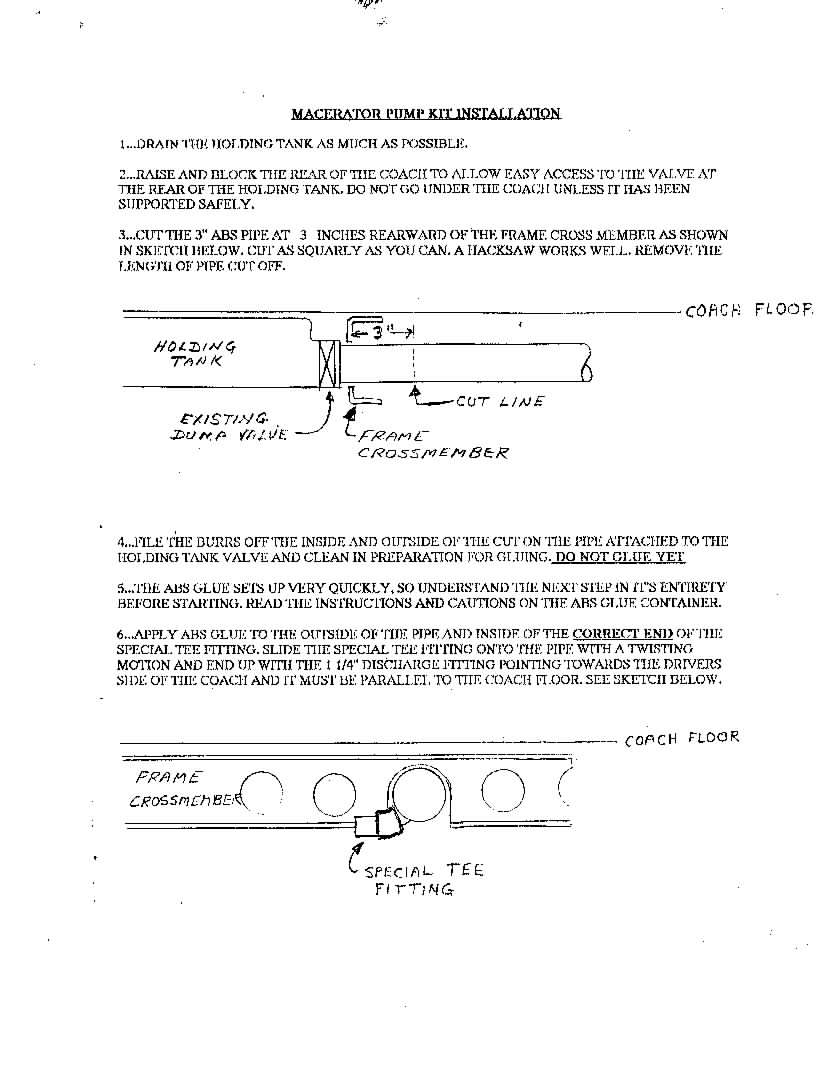
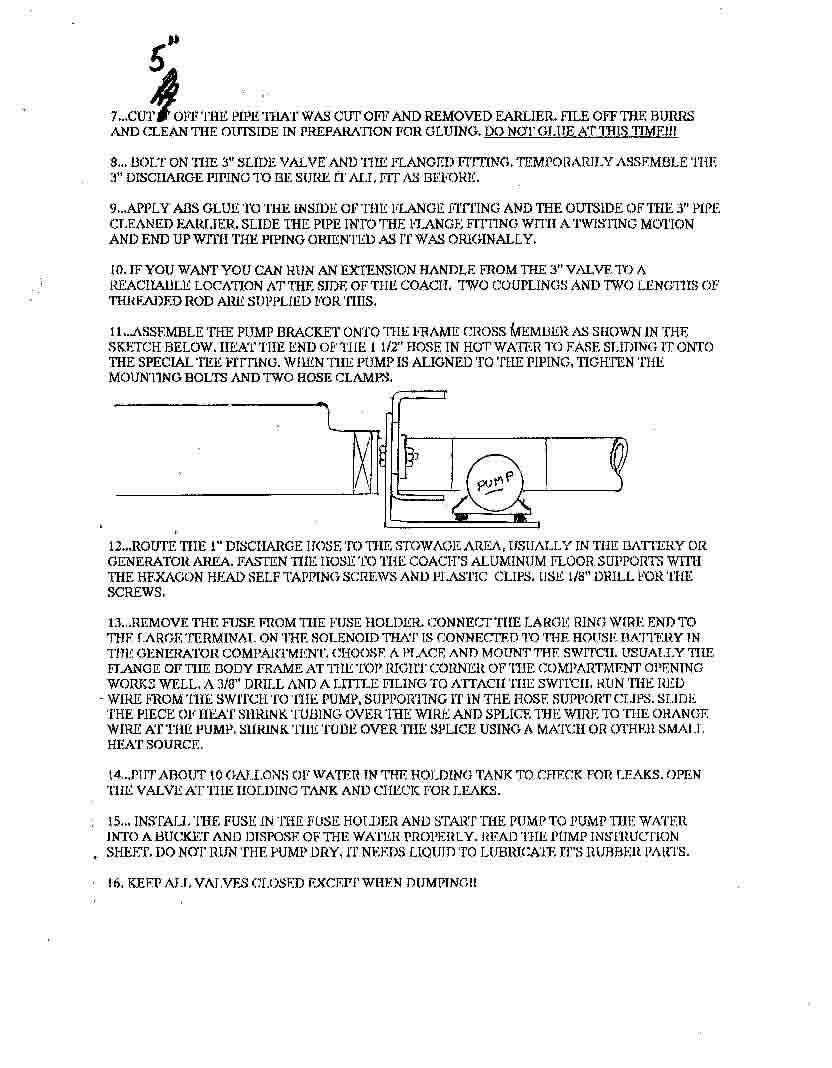
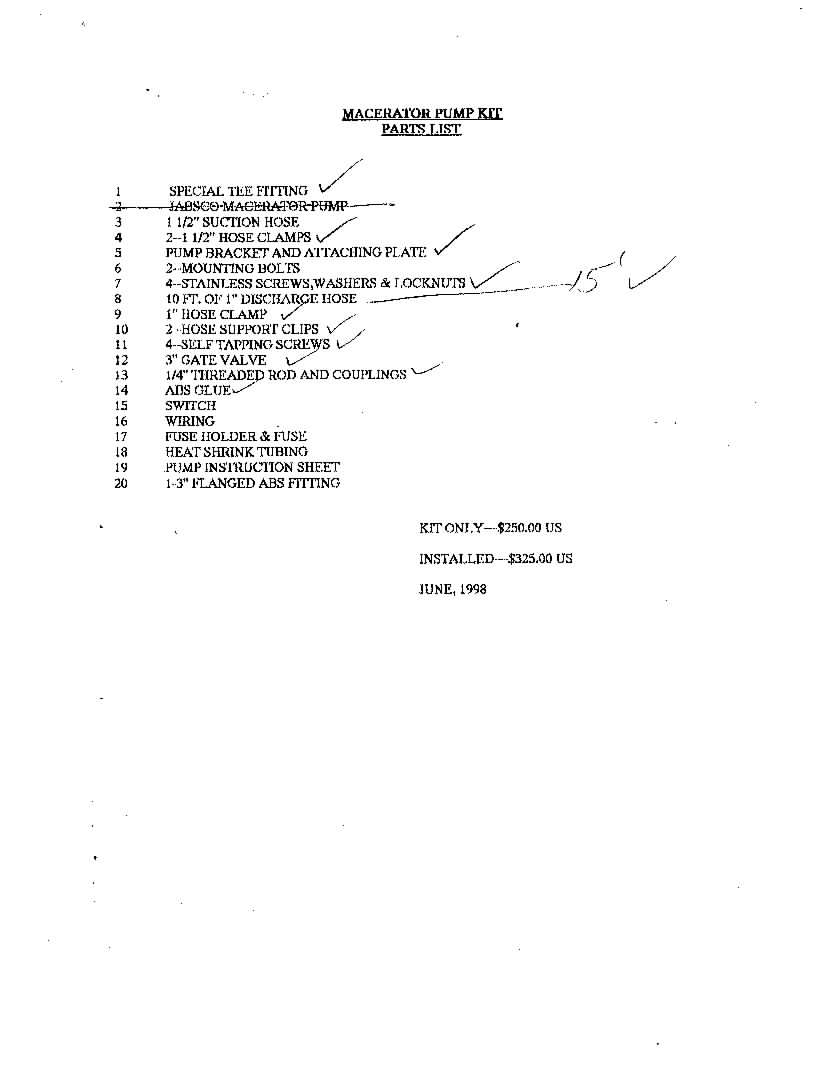
Shown here are the two pages of installation instructions and the packing list that came with the kit. Not bad actually for a limited run kit like this.
When I took the following pictures I had my camera set incorrectly. The resulting pictures were very large. Bill Massey took it upon himself to copy the pictures down to his PC, resize them and send them back to me. Thanks Billy!
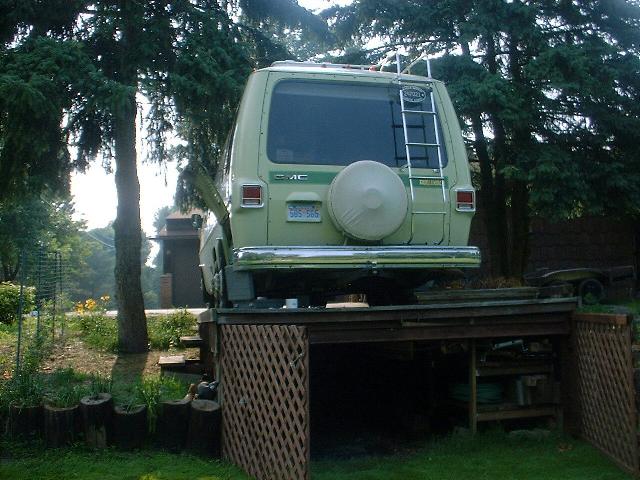
On the ramp again for the installation.
This is what the ramp looks like from the front.
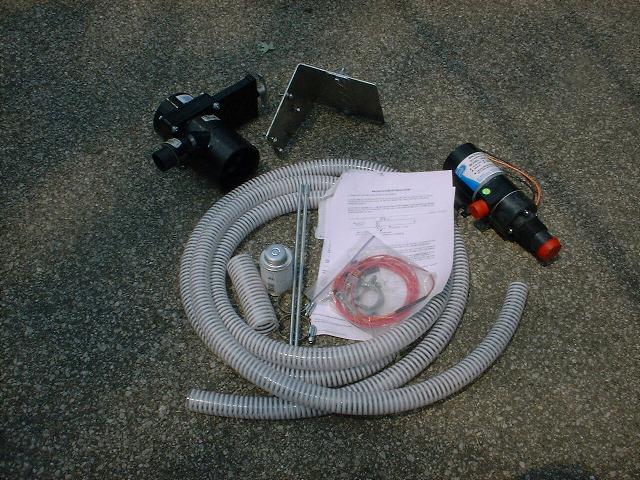
This was what I got in the kit except for the macerator. I bought that separately, Denny sells the complete kit with the macerator for $250 US. Not bad considering what the macerator costs from places like West Marine.
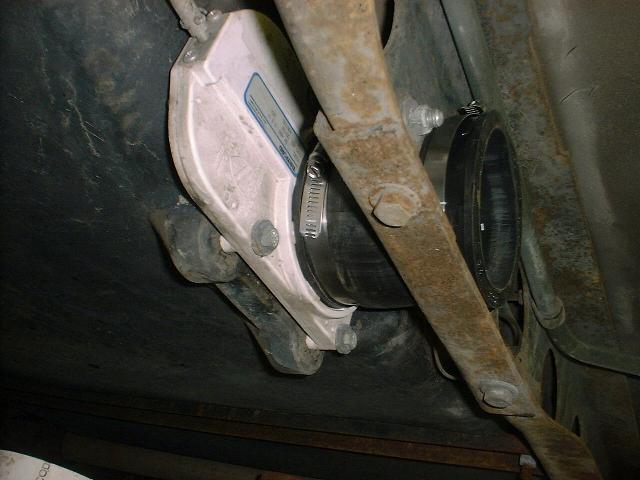
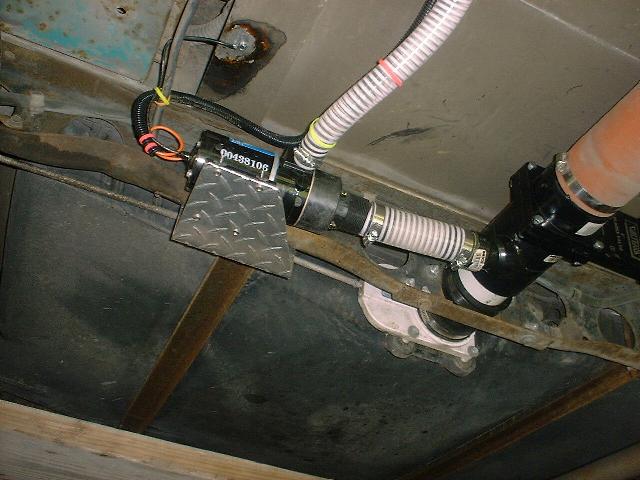
Denny's instructions say to cut the pipe coming from the holding tank valve 3" on the other side of the frame cross member. My new holding tank didn't have a pipe. It had a flexible silicon coupler. Therefore I had to buy a standard coupler from Home Depot to attach Denny's special valve to. This photo shows that coupler.
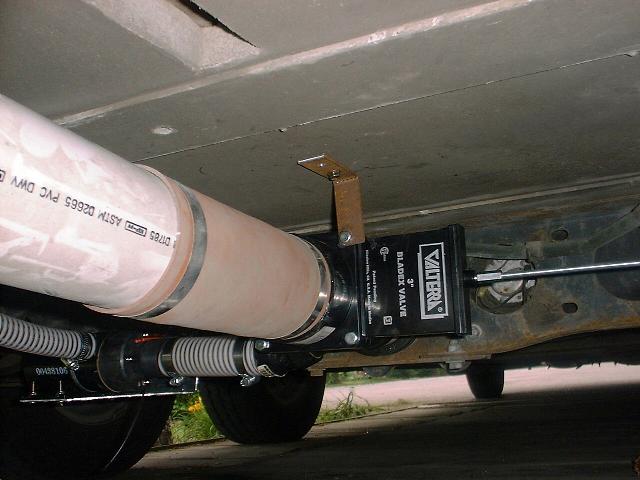
I had to add this bracket because my holding tank was non standard. The tank is new and was installed by Cinnabar. I didn't feel that the valve attached securely enough because of the rubber coupler that I had to use because of the Cinnabar installation.
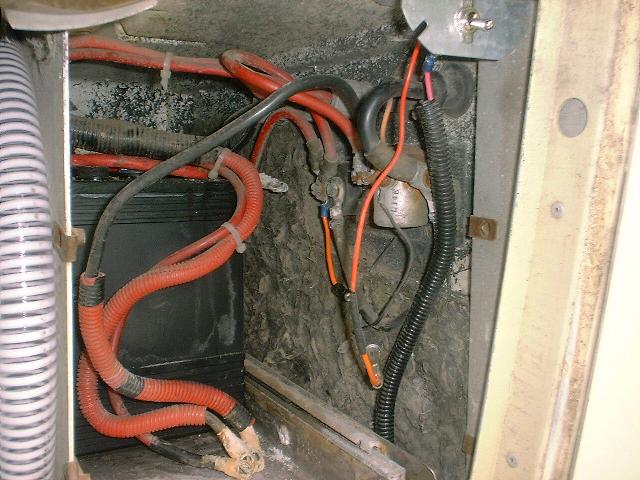
I attached the macerator power supply to the circuit breaker in the battery box because the nut on the solenoid was frozen. Denny said to connect it to the solenoid.
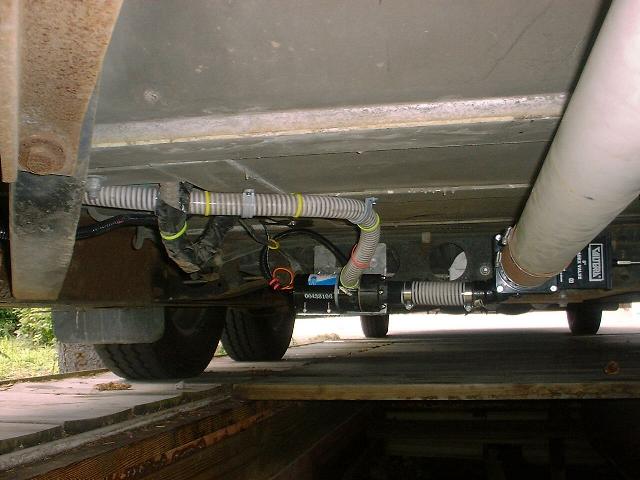
View from the back.
More rear views.
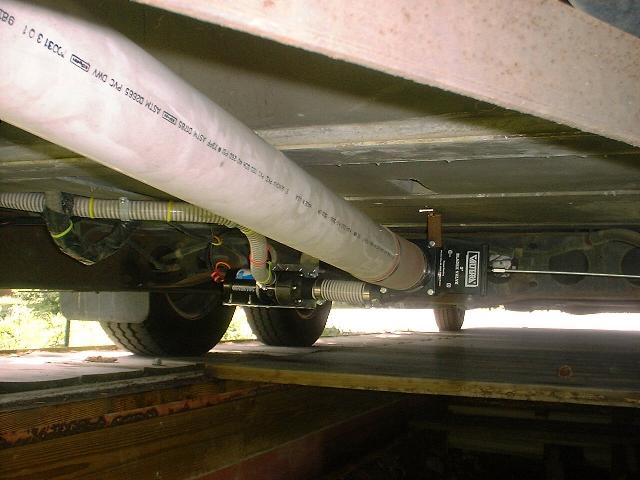
View looking up.
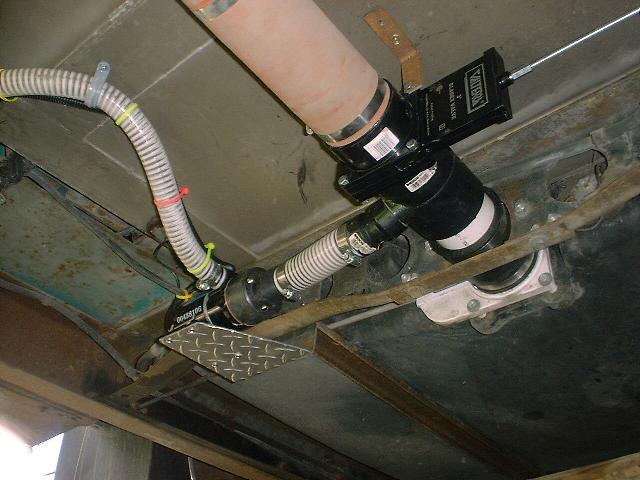
Another view looking up.
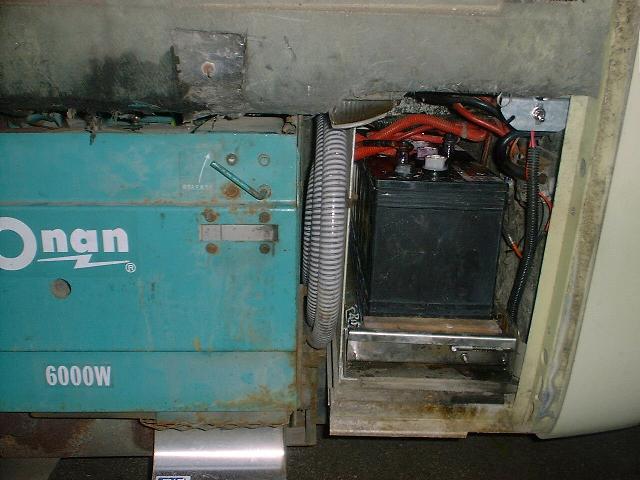
Storage of the 15' of hose that I ordered. You can also see where I attached the macerator on/off switch in the upper right hand corner of the battery box.

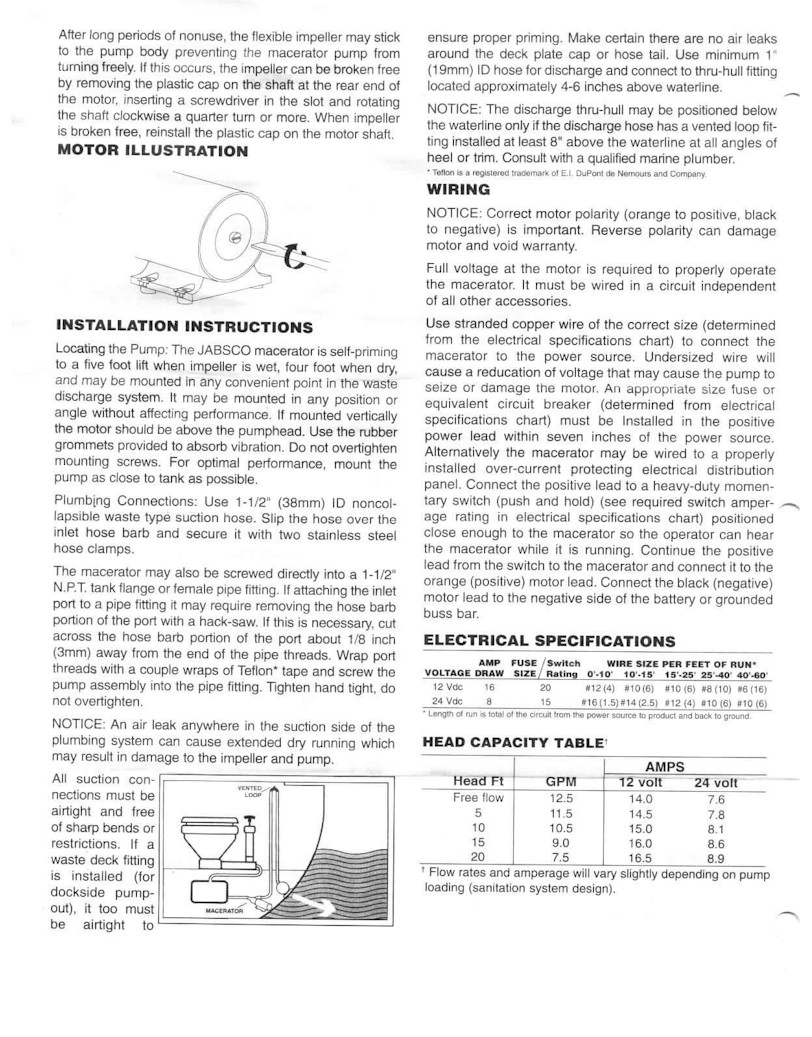
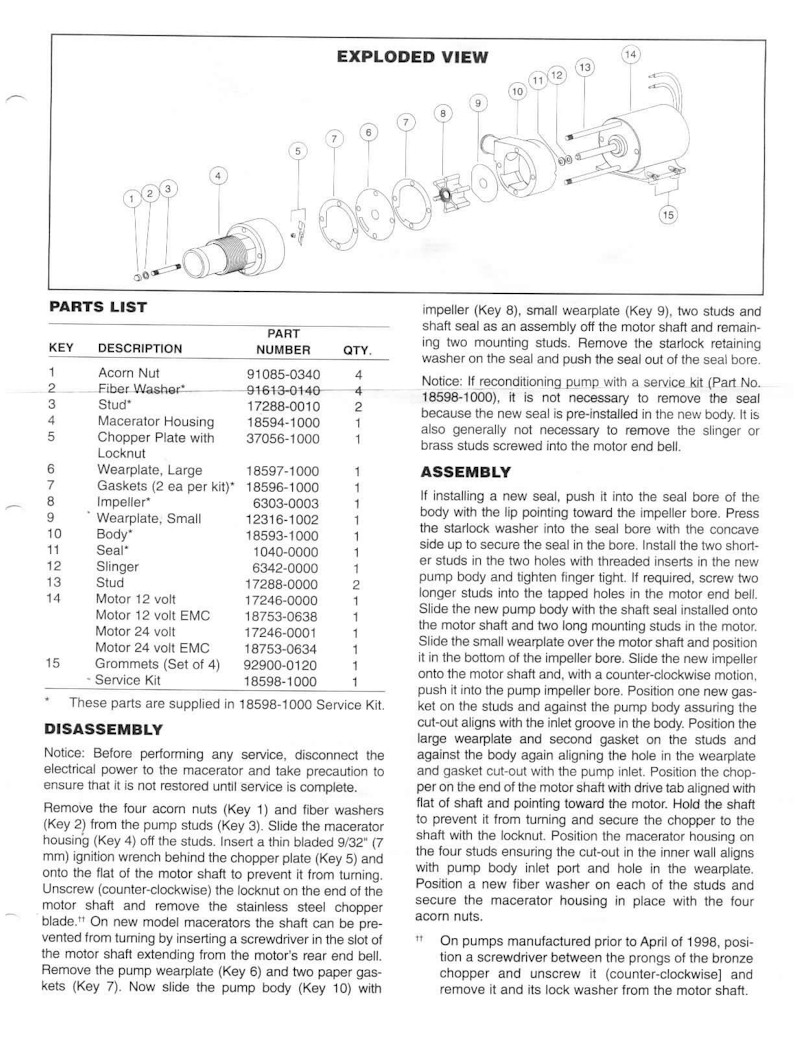
This is the 4 page Manual that came with my Macerator Pump.
14-Jul-2001
GMCers
Well, I did it today. I put the old poop shooter on today. Started at 9:30 this
morning and pumped the first water at 4 PM. It is all done including repainting
my battery hold down. If any of you want to do this get Denny Allen's kit. It
has everything you need. The switch even comes prewired. He even includes the
glue for the fittings. The instructions are VERY complete. The only thing in my
kit that would not work was the piece of heat shrink tubing that was included.
Now understand this was my problem when I butt splice two wires I use a Western
Union splice. I don't just wrap the wires together. By the time I soldered the
joint there would have been no way for the piece Denny sent would have worked so
I used a piece of my own. The kit and the instructions were by far the best I
have ever used---very complete and everything went together EXACTLY as stated. I
did NO fudging or cobbling to make anything work. The only glitch in this
project was a fast trip to the hardware store. When I took off the U bracket
that supports the drain pipe broke in two pieces. It was worn thin and rusted in
the middle---just fell apart. Everything else went according to the plan---I don't
have many days like that!
I would like to that Emery for his thoughts on 3/4 inch hose and cap. I would
like to thank Gene for his electric conduit ideas and for sending me pics last
night when PhotoPoint was still down. I would like to than Richard Waters for
making me aware of Denny's kit. Most of all I would like to thank Denny Allen
for making a kit that was a pleasure to work with and a dream to install. Thanks
again Denny!
Take Care
Arch
Eugene Fisher
Some higher-end RVs have macerator pumps installed permanently. Rather than using a the standard RV “stinky slinky” the owners of these rigs play out a normal garden hose to a dumping point. The macerator grinds up the contents so they can flow through the smaller hose.
Page was last modified: 03/27/2019 10:05:07 AM
